This page has been moved to FSFE docs.
Guide: Your first commit
If you ever worked with SVN before, you'll know most of the basics already. However, Git involves an additional step but you'll learn that quickly.
First of all, you should create an own repository where you can experiment without interfering with others' files. You can always delete them afterwards.
Create a repository
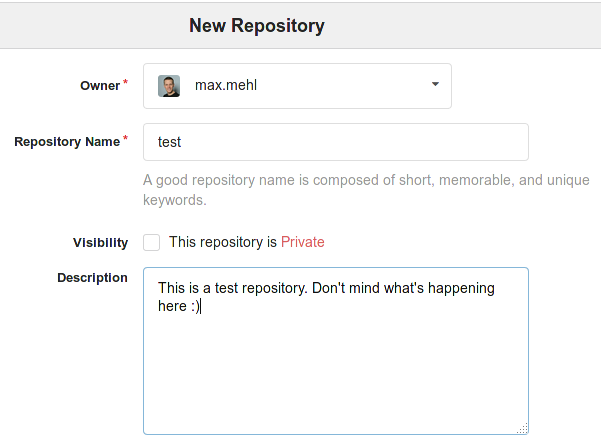
On the upper right area on git.fsfe.org, you find a + sign. Pressing it, you can select New Repository. In the following window, just give it a short name and a description. You can also hide the repository from other people. Please note that if you hide it, even people who know the link cannot access it (but you can give access to selected users in the respository setting later). The other options are not interesting for you yet. Just click on the green button to create this repository.
In the next step, you'll be redirected to your new, empty repository. Now it's time to switch to your Terminal, clone (copy) the repository to your computer, add a new file, and commit and push the changes to the server to make them public. It's assumed that you completed the previous guide on first steps.
Make a first commit
Copy the link to your new repository. You have two options: HTTPS and SSH. Choose the SSH link because this doesn't require you to type in your credentials with every change you make on the server. The link may look like git@git.fsfe.org:username/test.git.
Now, let's clone the whole repository to your computer to a location of your choice. In this guide, it's assumed that you want the new repository copy to be created in the FSFE folder in your personal home directory.
mkdir ~/FSFE
cd ~/FSFE
git clone git@git.fsfe.org:username/test.git
These command created a new folder FSFE in your home directory, switched to that folder and then cloned (copied) the empty repository to a new folder called test (or whatever you named the repository).
Now, you can do whatever you want inside the test directory. It's empty, so create a file called README.md on your computer and write something in it. This should always be one of the first files to create in a new project: it gives a more verbose description to visitors and contributors about what you're doing here. Also, Gitea prominently displays the content of the file when people visit your repository. For this test scenario, just write something stupid in it.
After you created (or modified) the file, go back to your terminal:
cd test
git status
With these command, you just switched to the (now not empty anymore) test repository and displayed files that git recognizes as new or modified (in this case README.md). This command is similar to svn status. Red files are not considered for commits yet, so we have to add them:
git add README.md
If you type git status again, you'll see the file inked green. Now we have to explain what we did with this file, and push the changes to the server to make them available to others.
git commit -m "added README file (in the future, you can write more verbose information here)"
git push
After the first command (commit), you have saved your changes locally. git status won't display the README.md file anymore. But only with the second command (push), you wrote the changes to the server. This is different from SVN where a commit basically does both operations in the same step.
If you now visit https://git.fsfe.org/username/test, you can see the newly created file. Congratulations, you now understand the most basic file operation in Git!
Further reading
Now that you understand basic interactions with Git, you can check out TechDocs/Git/Workflow to see how you might use Git for a real project.

